How To Delete Bluetooth Device From Pioneer Radio
Pioneer stereos allow for three simultaneous connections via Bluetooth. If you want to add a fourth device, you will have trouble pairing the device. To remedy the situation, you will have to remove one of the previously paired devices to make room for a new one.
How to delete Bluetooth devices from Pioneer radio? It’s pretty straightforward. If you want to replace one of your old devices with a new one in the pairing list of your Pioneer stereo, stay with us for the remainder of this article.
How To Delete Bluetooth Device From Pioneer Radio
Step 1. Disconnect All Devices From The Radio
Before you start, make sure there are no live Bluetooth connections to the radio. If the paired devices are still connected to the device, the Bluetooth memory might not clear properly.
Step 2. Switch Off The Radio
You also need to turn off the radio before attempting to remove the paired devices from the unit. Find the SOURCE button, press it and hold it down. The radio should switch off.
Step 3. Access The Menu
After you turn off the radio, access the menu. Hold the center dial, and the radio menu will pop up on the screen.
Step 4. Access System Menu
You will have to enter the system menu next. Rotate the dial to navigate the radio menu. Once you find SYSTEM, enter it by tapping at the center of the button.
Step 5. Delete Device
You will see a list of paired devices after entering the system. If you scroll further, you can also see a CLEAR BLUETOOTH MEMORY option. You can choose to delete all devices at the same time or go through the list of individual devices and delete one of your choices.
Pioneer Stereo Bluetooth Memory Full Problem: How To Solve It
Some Pioneer users have reported that the Bluetooth memory shows full even if they did not connect the maximum number of devices to the stereo. And when they tried to clear Bluetooth memory, the stereo became irresponsive.
The potential root of this problem could sound surprising to you. If you don’t connect the stereo’s parking brake sensor to your car’s parking brake, the stereo will lock you out of the Bluetooth settings.
Now, why on earth would Pioneer do that? Because they want you to do the responsible thing and keep your eye on the road while driving. If the stereo can’t tell that you are actually parked, it will not allow you to access the settings. So, you will have to make the stereo realize that you are actually parked.
If you have been facing a similar problem, here’s what you can do.
Step 1. Disconnect The Battery Terminals
Since you will be working with wires, you should disconnect the battery terminals to avoid electrocution risks. Just unplug the terminals, and you are good to go.
Step 2. Remove The Center Console Piece
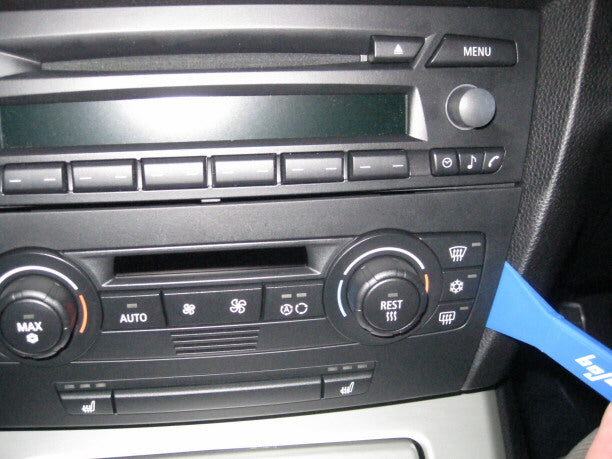
Begin by removing the center console of your vehicle. Since that’s a vehicle-specific procedure, we will not get into the details of it. You can look up how to remove your car’s center console, follow the steps, and remove it.
Step 3. Find The Parking Brake Wire
Identify the brake line wire in your vehicle from the wiring harness. Consult a reference chart to know for sure which is brake line wire for sure.
Step 4. Find The Car Audio Power Wire
Now, locate the car’s audio power wire. Look at the stereo manual to know what you are looking for.
Step 5. Splice Them Together
Next, you will have to splice them together. First, take a pair of pliers and remove approximately an inch of cable jacket from the power wire. Then, do the same for the parking brake line. Be careful while doing this because you might damage the inner insulation.
Connect the similar colored wires with wire nuts and cover them with tape after you are done. Don’t use only tape to join the wires, as it should only be used as a temporary measure. After you connect the power line brake to the stereo, the stereo should be able to detect when the car is parked. So, the previously faded-out menus should become accessible.
Step 6. Reinstall The Center Console And Reconnect The Battery
Now put back the center console. After you are done with that, get under the hood and reconnect the power cables to the battery terminals.
This entire scenario could be avoided if you connect the power brake line to the stereo while installing it. So, make sure to do that if you plan on putting on a new Pioneer stereo in your car.
Final Words
Even if you know how to delete Bluetooth devices from Pioneer radio, you might face difficulties in clearing your Bluetooth memory. This could happen due to improper Pioneer stereo installation.
If you can’t get into the relevant settings to delete Bluetooth devices from your Pioneer stereo, make sure that the parking brake line of your vehicle is connected to the stereo. You can follow the troubleshooting guide we provided above or choose to bypass it by installing a parking brake bypass in your car.
However, we strongly discourage the use of parking brake bypasses as it significantly bumps up accident risks. So, take the troublesome route and manually connect the stereo to the power brake. We assure you it’s worth the trouble!